Dormer Loft Conversions
The most common loft conversion in Essex, and usually permitted development on a rear roof slope.
A dormer is a box built out from the rear roof slope, with vertical walls, a flat or shallow roof of its own, and windows in the face. It exists for one reason: to replace a sloping ceiling with a straight wall, so the room underneath has full head height instead of a triangle of space you can only stand up in along the middle. It is the most common loft conversion in Essex, and on a rear slope it is usually permitted development.
What a dormer actually is
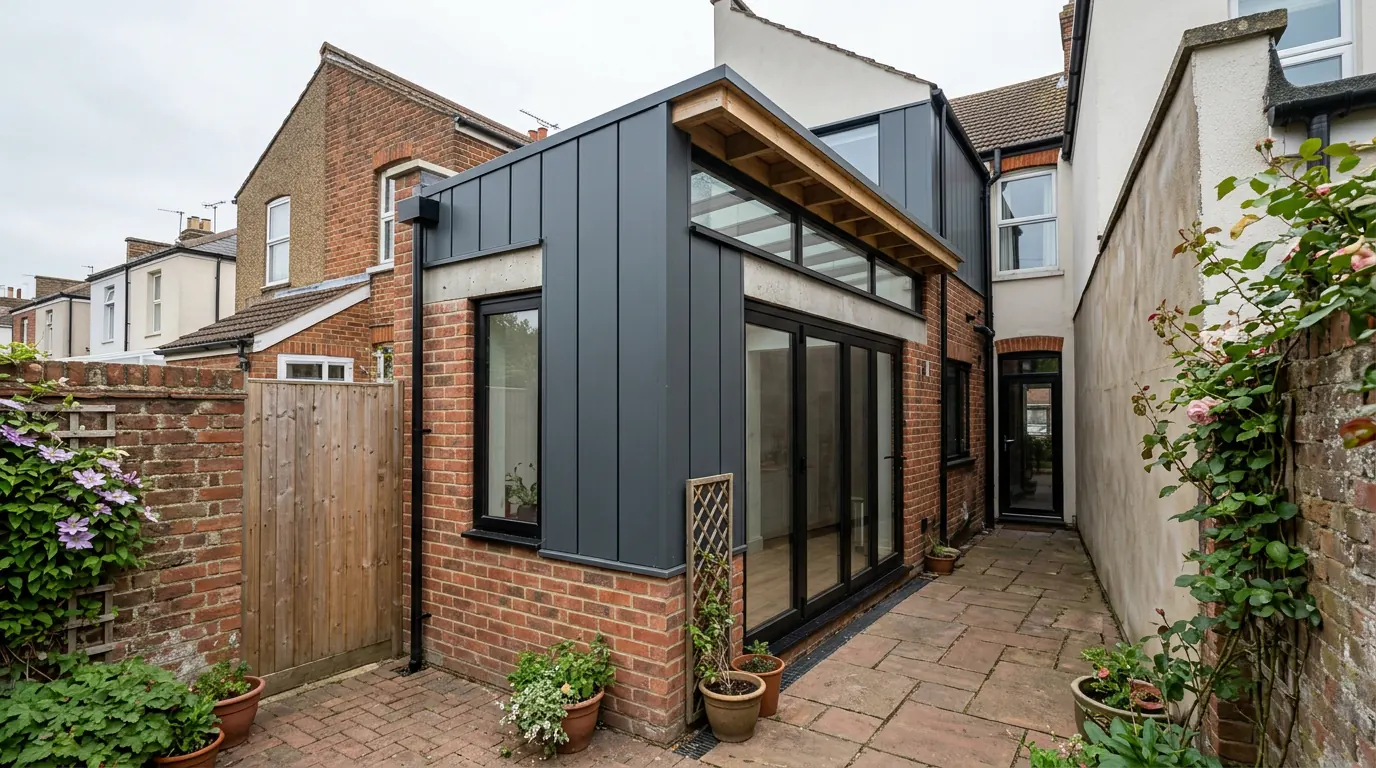
A box pushed out of the roof slope, turning a triangle into a room.
Stand in an unconverted loft and the problem is obvious. The roof slopes down on both sides, so the only place you can stand upright is a narrow strip under the ridge. Everything either side of that strip is head height you cannot use, and it is usually the part of the floor where a bed, a wardrobe or a shower would want to go.
A dormer removes a section of the rear roof slope entirely and replaces it with three vertical faces and a roof. The two side walls are called cheeks. The front face carries the windows. The roof over the top is normally flat, laid to a slight fall, though it can be pitched on a smaller dormer. The floor of the dormer is the floor of the room, continuous with the rest of the loft.
What that buys you is straight wall. Inside a dormer you have full ceiling height right up to the window, which means a bed can go against the back wall, a wardrobe can stand upright, and an en suite fits into a corner rather than being wedged under a slope with a shower head at chest level. The volume gain looks modest on a drawing. The usable gain is considerably larger than the volume suggests, because the space it adds is the standing-height space, and that is the only kind that counts.
It is worth being clear about what a dormer is not. It is not a way of making a short loft taller than the ridge, because nothing may go above the existing ridge. It creates height where the roof was low. It cannot create height where the roof itself is low overall.
How a dormer differs from the other conversions
Five common types. The dormer sits in the middle on cost and near the top on usable space.
A rooflight conversion leaves the roof shape untouched and puts windows in the existing slope. It is the cheapest by a wide margin, it rarely troubles planning, and it only works where the existing head height is already sufficient. The sloping ceilings remain, so the usable floor area is whatever the roof gives you.
A hip to gable replaces a sloping hipped roof end with a vertical gable wall. It solves a different problem: not the height along the slope, but the width of the roof at the top. Hipped roofs come to a point at one or both ends and the loft narrows to nothing, so squaring the end off is what makes the space usable at all. It is very frequently combined with a rear dormer on the same house, because the two solve different halves of the same problem.
An L shaped dormer is a rear dormer on the main roof joined to a second dormer over a rear outrigger, meeting in an L. It suits Victorian and Edwardian houses with a back addition and it produces a great deal of space, though the junction where the two roofs meet is a detail that has to be built correctly or it will leak.
A mansard is not a dormer at all. It rebuilds the whole roof to a near vertical pitch with a shallow top, and it gives more space than anything else. It changes the shape of the building completely, so it almost always needs a full planning application, and it costs accordingly.
The plain rear dormer sits between these. It is more expensive than rooflights and less expensive than a mansard, it takes a marginal loft and makes a genuine double bedroom out of it, and on most Essex housing it is the option that gives the best result for the money.
Why the rear slope, and why almost never the front
Permitted development bans anything beyond the plane of the roof on the elevation that fronts a highway.
The permitted development rules for roof extensions contain one condition that shapes every dormer in the country: no part of the extension may extend beyond the plane of the existing roof slope on the principal elevation where that elevation fronts a highway. In plain terms, if the front of your house faces a road, you cannot build a dormer on the front roof slope without applying for planning permission.
That is why rear dormers are everywhere and front dormers are rare. It is not a matter of taste or of what looks better. It is a hard condition, and a front dormer built without permission is unauthorised development, not a technicality.
Two points catch people out. The first is that “highway” includes footpaths and bridleways, not just roads, and the second is that on a corner plot the side elevation can also front a highway, which restricts what you can do on that slope too. If your house sits on a junction, the position needs establishing before anyone draws anything.
Front dormers can be applied for and are sometimes granted, particularly in areas where they already exist along the street. We cannot tell you what any authority will decide, and we will not pretend otherwise. What we can tell you is that it becomes a full application with a case officer, a consultation period and a decision that may go either way, and it should be budgeted and programmed on that basis rather than assumed.
Will you need planning permission?
Four questions, an honest answer, and nothing sent anywhere. This runs entirely in your browser.
What are you extending?
Permitted development rights for extensions apply to houses. Flats and maisonettes are a different route entirely.
Is the property listed?
Listed building consent is a separate decision from planning permission, and work without it is a criminal offence rather than a planning irregularity.
Has the house been extended before?
Depth is measured from the ORIGINAL rear wall, so a previous owner's extension has already used part of your allowance. This catches almost everybody.
Is it in a conservation area?
Colchester has a number of them, including the historic core, the Dutch Quarter, part of Lexden and several village centres. The boundaries rarely follow the roads you would expect.
Answer the four questions for an indication
Whatever the answer, Building Regulations approval is always needed. We check the planning history, the designation and the deeds on your address before anyone draws anything, because it decides the design rather than the other way round.
This is an indication based on four questions, not advice on your property. Planning rules change and the position depends on your specific address, its planning history and its designation.
The volume allowance, in cubic metres
Roof extensions are limited by volume, not by depth or width.
Unlike a rear extension, which is measured in metres of projection, a roof extension under permitted development is limited by the volume of additional roof space created. Broadly, the allowance is 40 cubic metres for a terraced house and 50 cubic metres for a semi detached or detached house.
Three things about that allowance are routinely misunderstood. The first is that it is cumulative. It is the total for the dwelling, not per project. If a previous owner added a small dormer, a rooflight enlargement that raised the roof, or a gable extension, that volume has already been spent and only the balance remains. A house that has been extended into the roof before may have very little allowance left, or none.
The second is that it includes everything added to the roof, not only the piece you are building now. A hip to gable on the same house consumes volume from the same allowance, which is why a hip to gable plus a full width rear dormer on a terraced house frequently exceeds 40 cubic metres and becomes an application. On a semi the extra ten cubic metres often makes the difference.
The third is that it is a genuine calculation, not an estimate. The volume is measured as the enclosed volume of the roof extension, and on a marginal case it is worth having it worked out properly on a drawing rather than guessed on site. A dormer that is 300mm too wide is not a small problem if the whole conversion depended on it being permitted development.
Terraced is also broader than people expect. For these purposes a house in a terrace of any length counts, including an end of terrace, which is why the 40 cubic metre figure applies to more Colchester housing than the word “terrace” suggests.
The set back from the eaves
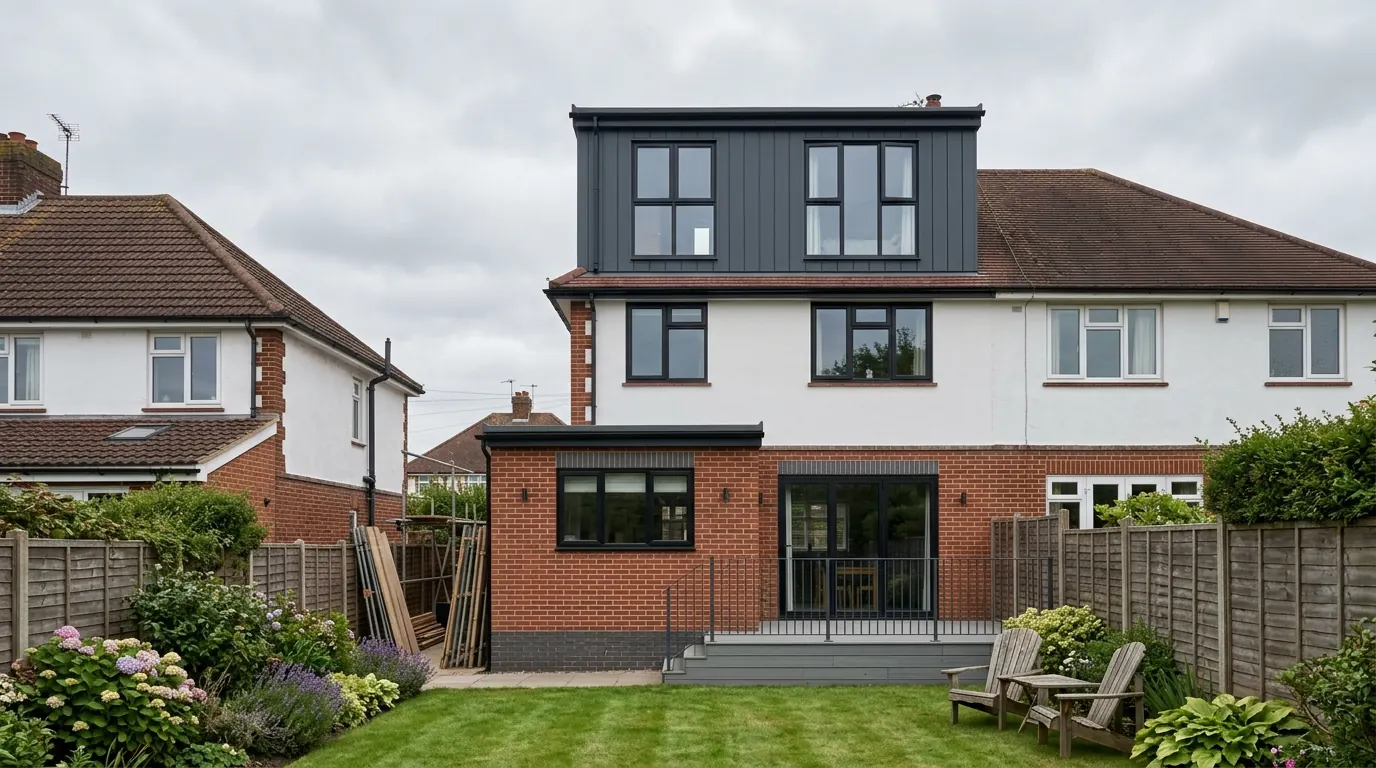
A permitted development dormer cannot run out to the gutter.
The rules require the roof extension to be set back, so far as practicable, at least 200mm from the original eaves, measured along the roof slope. In practice that means a strip of original roof slope is retained at the bottom, below the dormer, rather than the dormer face dropping straight down to the gutter line.
There are two reasons this matters and only one of them is regulatory. The regulatory one is simple: a dormer that runs out to the eaves is not permitted development and needs an application. The practical one is that the set back is also where the dormer is weathered. That strip of retained slope, and the way the dormer cheeks and face are dressed into it, is what stops water tracking behind the structure. Dormers built hard to the gutter are more difficult to make watertight and they are a common source of the damp patch on the ceiling below.
The set back does cost you a little floor area at the front of the dormer, though not usable area, because that strip sits below the window at ankle height. It is not something to fight against.
It also affects the appearance more than most people expect. A dormer that stops short of the eaves reads as an object sitting in the roof. One that runs the full slope reads as a change to the roof shape, which is exactly why the rules distinguish between them.
Want this checked on your actual address?
Planning history, designation and deeds. We look at all three before anyone draws anything, and it costs you nothing.
Side windows, materials and the ridge line
Three more conditions, all of them absolute.
Any side facing window in the dormer, meaning a window in a cheek rather than the face, must be obscure glazed, and must be non opening unless the opening part is more than 1.7 metres above the floor of the room it serves. That is a privacy provision and there is no discretion in it. It matters at design stage because a cheek window is often exactly where somebody wanted a clear view down the garden, and the answer is that it can be a light source but not a view.
The materials must be similar in appearance to the existing house. That is a condition, not guidance. Similar in appearance is not identical, and it allows for the practical reality that you cannot always match a 1930s clay tile, but it does rule out a dormer clad in something the house has no relationship with. In a conservation area the same words are read far more strictly, which is one reason those areas are treated separately below.
Nothing may be higher than the highest part of the existing roof. The dormer roof has to sit below the ridge line. On a shallow pitched roof that is the constraint that decides whether the whole thing is viable, because if the dormer roof has to sit below the ridge and the ridge is low, the head height inside the dormer follows the ridge down with it.
There is also a general condition that the roof enlargement is not permitted on a dwelling where it would overhang the outer face of the wall of the original house, which rules out a dormer built out past the line of the back wall.
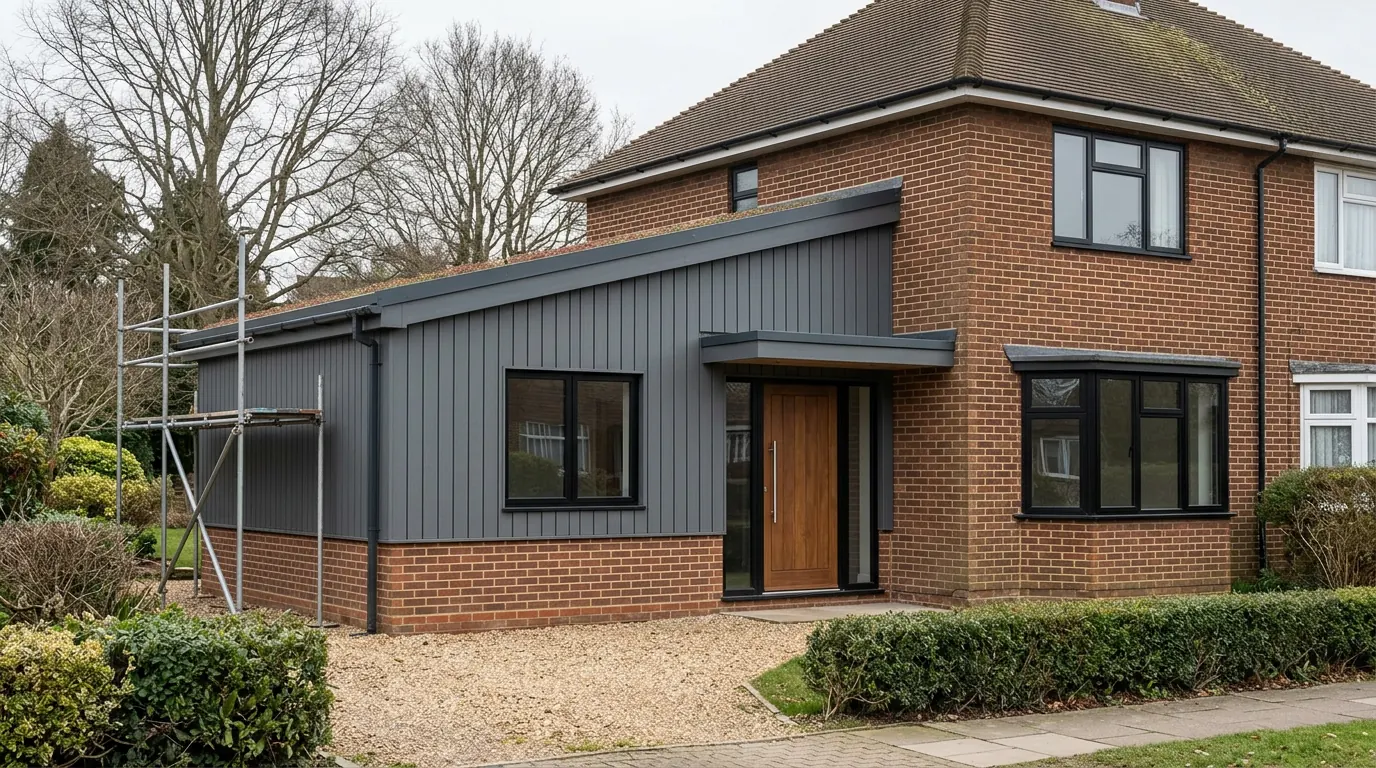
What removes permitted development, and what restricts it
Some properties have no roof permitted development at all. Others have it narrowed.
Permitted development for roof extensions is removed entirely for flats and maisonettes, and where an Article 4 direction has withdrawn the relevant rights. Those are absolutes. A flat has no roof permitted development regardless of whether it occupies the top floor and regardless of what the freeholder says. A listed building is a different matter: listing does not itself remove permitted development, but it adds listed building consent for alterations affecting the building’s character, and on a historic roof that consent is by far the harder of the two to get.
Permitted development is restricted on designated land, which includes conservation areas, National Landscapes, which the legislation still calls areas of outstanding natural beauty and World Heritage Sites. On designated land the roof extension right is much narrower, and in practice a rear dormer generally loses permitted status and becomes a full planning application.
Those two categories are worth separating because people conflate them. A conservation area does not mean you cannot have a dormer. It means the decision moves from a checklist to a case officer, with a design and heritage judgement attached to it. Applications for rear dormers in conservation areas succeed and applications fail, and the difference is usually in the detailing, the materials and how visible the dormer is from the public realm.
Conservation areas around Colchester
A substantial amount of the housing best suited to a dormer sits inside a designation.
Colchester has a considerable number of conservation areas, and they cover a lot of the older housing where a loft conversion makes most sense. The historic core and the Dutch Quarter are the obvious ones. Part of Lexden is designated. Beyond the city, Dedham and Wivenhoe have designated centres with a high concentration of older and frequently listed property. Coggeshall has one of the most heavily listed centres in Essex, though it is Braintree District that determines applications there.
Inside those boundaries a rear dormer normally needs a planning application. What tends to influence the outcome, based on how these applications are generally assessed, is whether the dormer is visible from a public street or only from private gardens, whether it is subordinate to the roof rather than dominating it, whether it is set well down from the ridge and in from the sides, and whether the materials read as part of the building. A set back partial width dormer clad in tiles that match the roof is a different proposition from a full width flat roofed box in grey board.
We are builders. We are not going to tell you what a case officer will decide, and any builder who does is guessing. What we will do is design to the constraints that apply, involve the technician early, and be honest with you about where a scheme is likely to attract objection so you can decide whether to proceed, amend or stop.
Boundaries are precise and they are not intuitive. One side of a street is frequently inside and the other outside. It takes a few minutes to check on the council’s mapping and it is always worth doing before drawings are commissioned.
The same wall, before and after
Drag to reveal. A real job in the Colchester area, photographed as it went. No staging and no borrowed images.
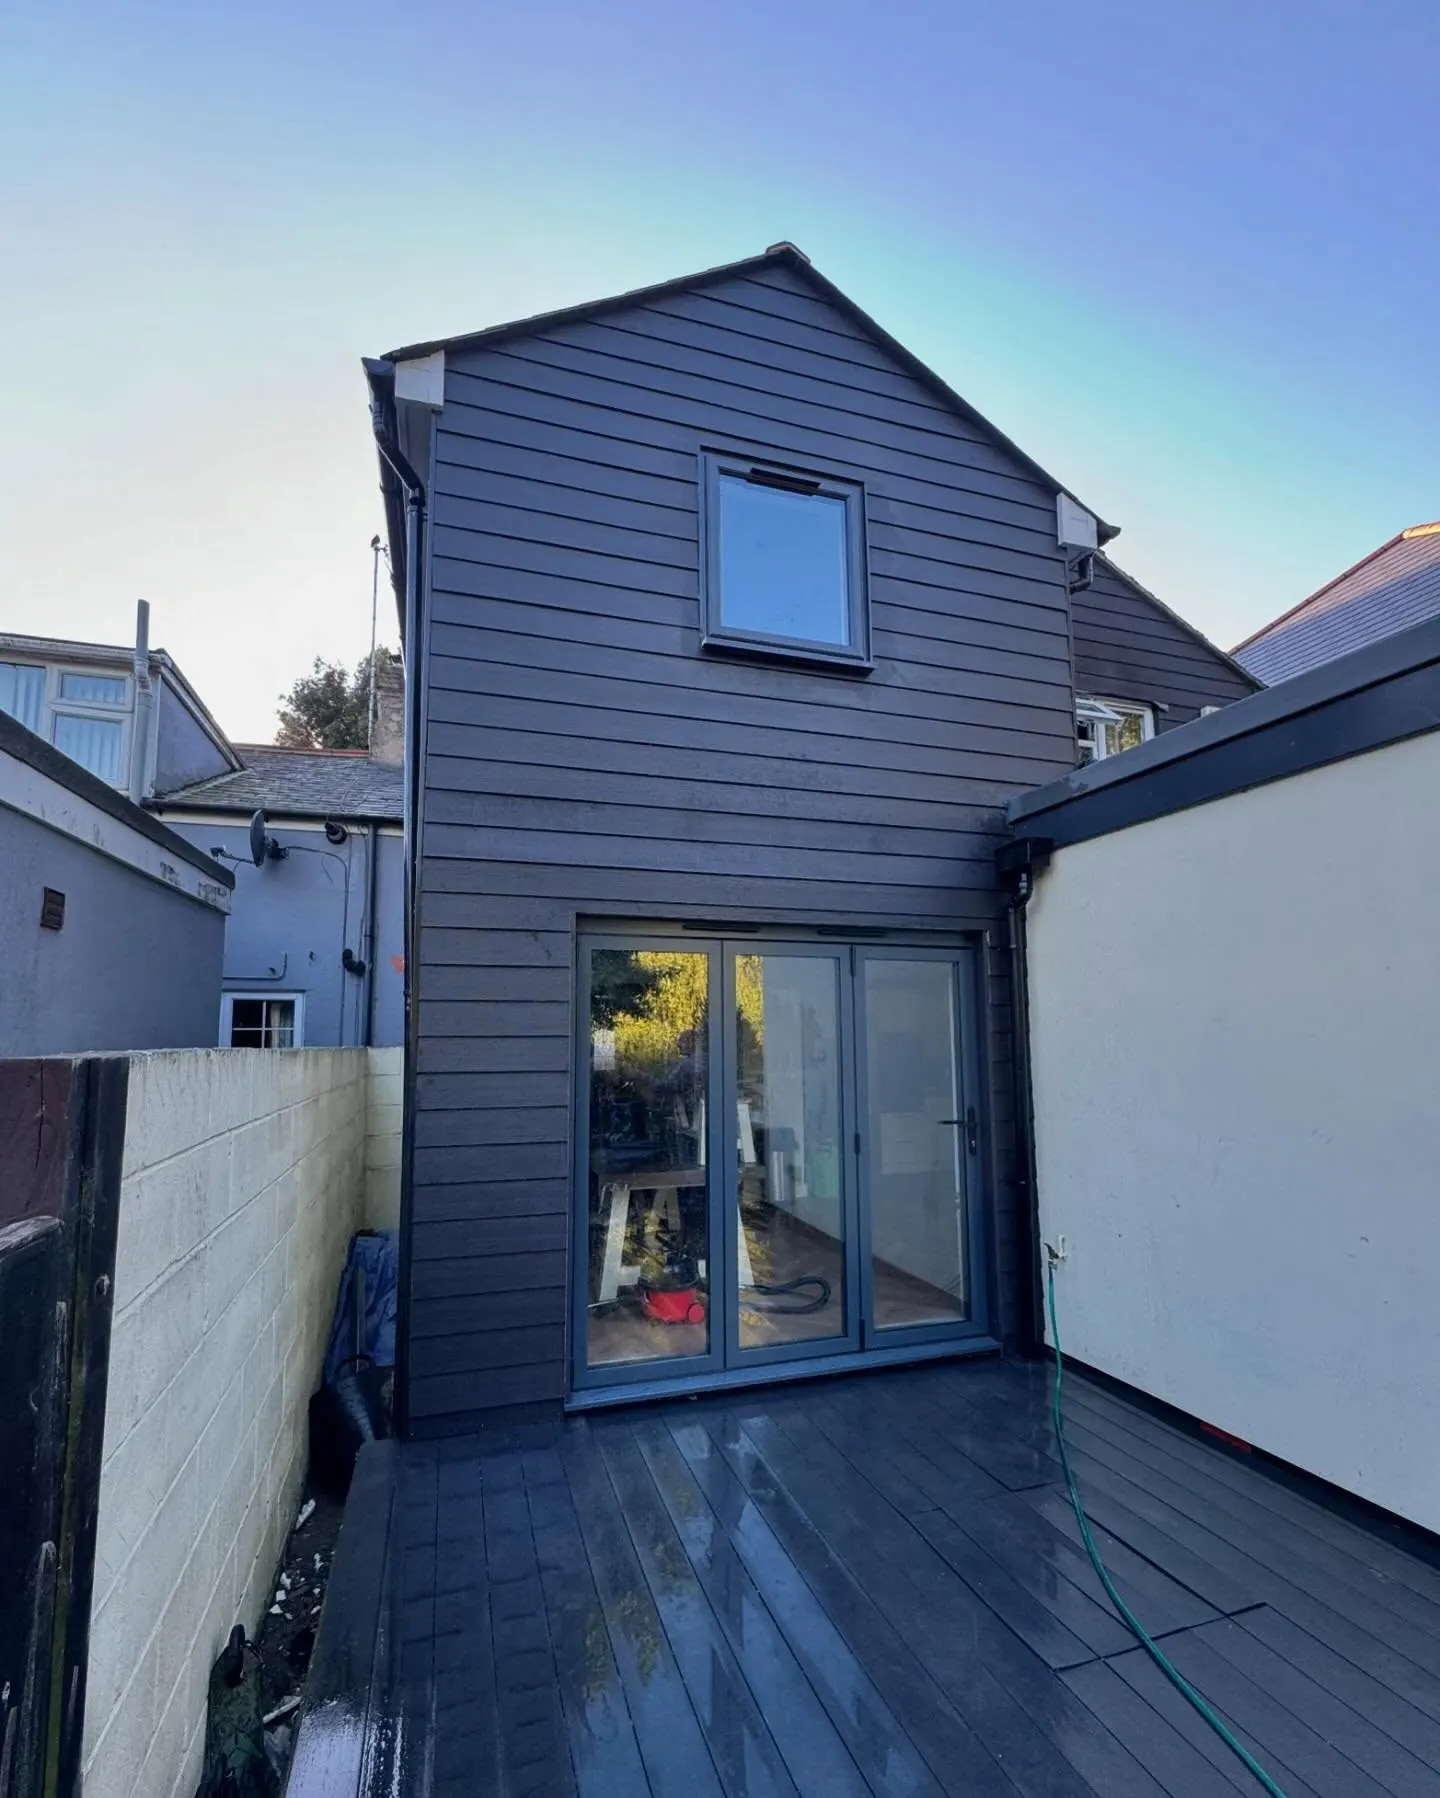
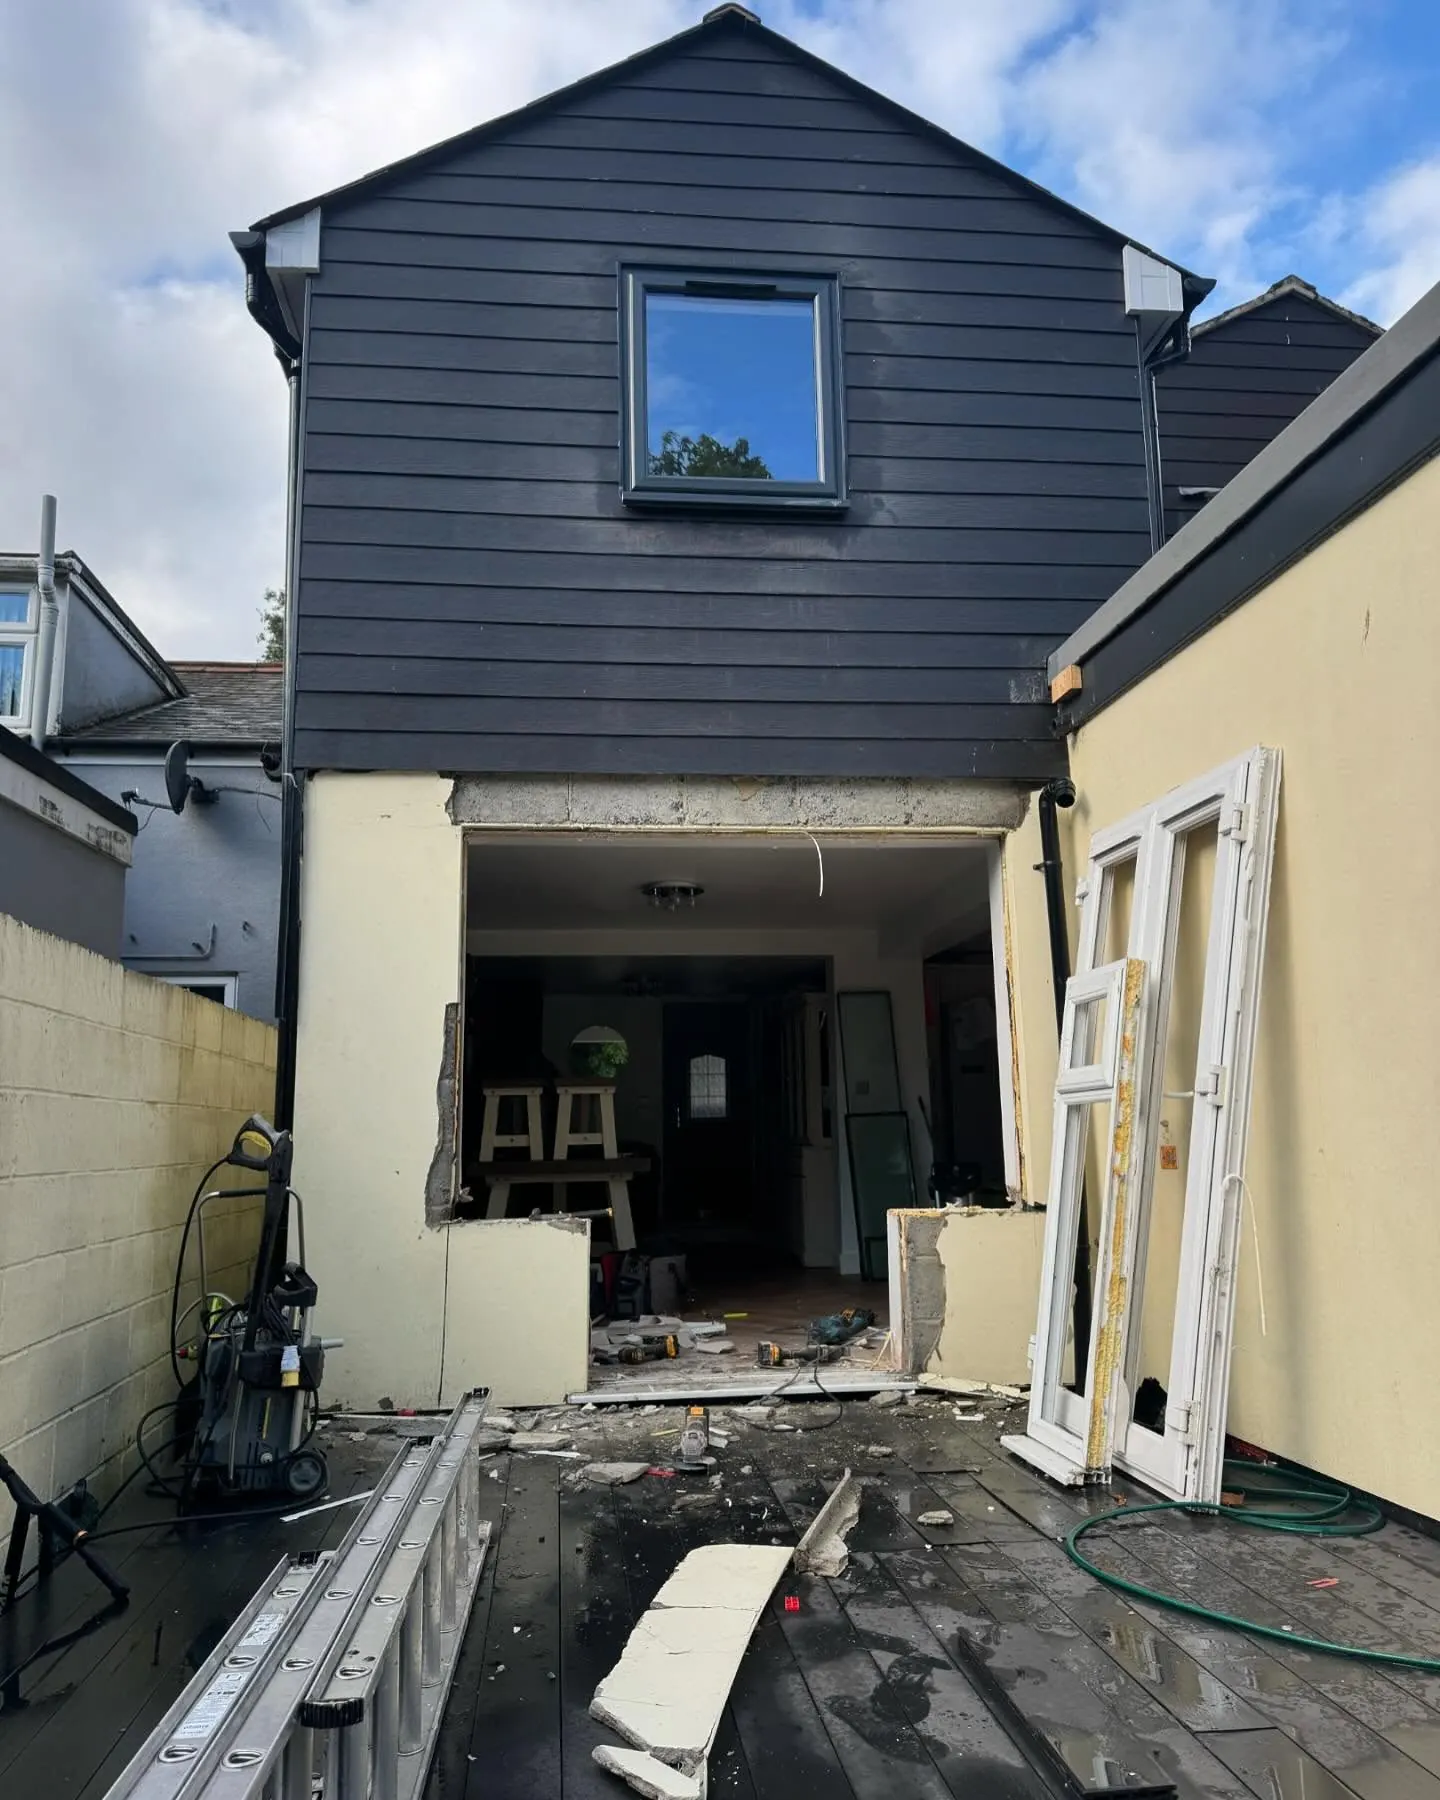 During
Finished
During
Finished
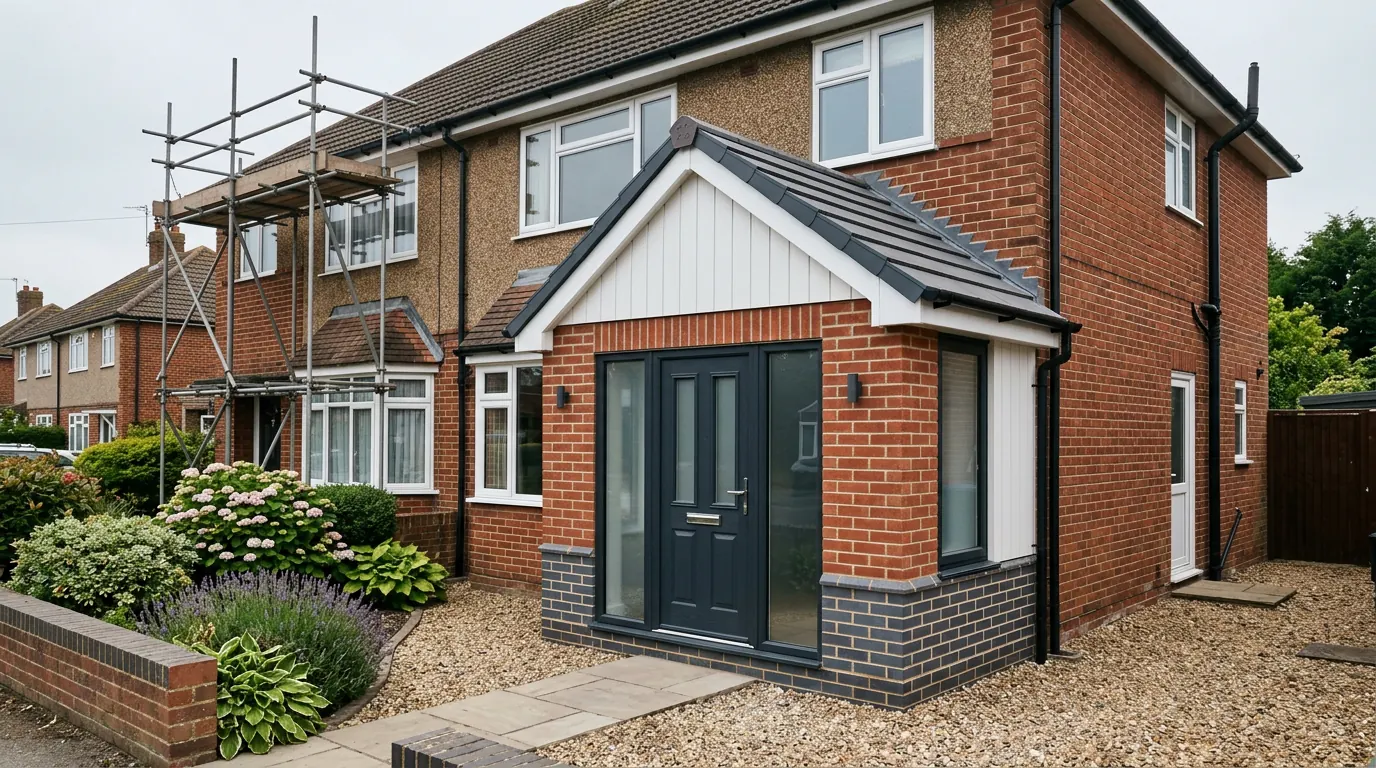
The condition on newer estate housing
A lot of housing built since the 1980s had its permitted development rights removed on day one.
When a housing estate is granted permission, the authority frequently attaches conditions to that permission removing permitted development rights across the whole site. The reasoning is usually about maintaining the appearance and density of the estate as approved. The effect is that a house on such an estate needs planning permission for work that would be permitted development anywhere else, including a rear dormer.
This catches people out constantly, because nothing about the house tells you. There is no marker on the deeds that a homeowner would necessarily notice, the neighbours may not know, and a builder who has not checked will quote the job as permitted development in good faith.
Estate housing from the 1980s onwards in Stanway, Myland, Highwoods and the newer developments around the edges of the city is where this is most likely. It takes about ten minutes on the council’s planning search to look up the original estate permission and read the conditions on it.
It is not the end of the project when it applies. It means an application rather than a certificate, which adds roughly eight weeks from validation and a fee, and it means the design has to be defensible rather than merely compliant. What it must not do is come as a surprise once the scaffold is up.
Why the Lawful Development Certificate matters
You are adding a bedroom. A bedroom is what a buyer’s solicitor asks about.
Where a dormer genuinely is permitted development, no planning application is required. That does not mean no paperwork is worth having. A Lawful Development Certificate is a formal determination from the authority that what you have built, or propose to build, is lawful. It is not permission. It is confirmation that permission was not needed.
The reason it matters on a dormer specifically is that a loft conversion adds a bedroom, and a bedroom is the single thing a buyer’s conveyancer will query. The question on the enquiry form is direct, and “it was permitted development” is an assertion by the seller rather than evidence. The certificate is evidence. Alongside the Building Control completion certificate it closes the point entirely.
Without both, a sale can stall while indemnity insurance is arranged, a retention is negotiated, or a buyer walks. It is a modest fee and a determination period of around eight weeks, and it runs alongside the build rather than delaying it if it is applied for at the right time.
It is also a check on the volume calculation. Applying for a certificate means someone at the authority looks at whether the dormer really does sit inside the allowance, which is a great deal more comfortable than finding out in five years that it did not.
Check three things before you get anyone out to quote. What the ridge to joist measurement actually is. Whether the address sits in a conservation area or under an Article 4 direction. And whether anything has already been added to the roof, because that volume has come out of the allowance and it does not come back.

Head height: the number that decides it
Measure ceiling joist to ridge. Everything follows from that figure.
Before drawings, before quotations, before anything, go into the loft with a tape and measure from the top of the existing ceiling joist to the underside of the ridge at the highest point. Write the number down. That single measurement tells you most of what you need to know.
As a working guide you want around 2.4 metres. The reason is that the finished floor sits above the existing ceiling joists and the finished ceiling sits below the existing rafters, and between the new floor structure, insulation, plasterboard and a service void you lose roughly 300mm at the top and around 150mm at the bottom. Take 450mm off 2.4 metres and you have a shade under 2 metres of finished height, which is a room.
Building Regulations set no minimum ceiling height for a habitable room, which surprises people. What they do set is 2 metres of headroom over the staircase and at the top of the flight, measured vertically above the pitch line. That is a hard requirement and it is very frequently the thing that decides where, or whether, the stairs can go.
Below about 2.2 metres a dormer alone will not rescue it, because a dormer creates height at the sides, not at the ridge. If the ridge itself is low, the options are raising the ridge or a mansard, both of which are full applications and a different order of cost. This is the honest conversation we would rather have on the first visit than at week three.
Five things you can check yourself.
Trust on a building job should be verifiable, not asserted. Every one of these can be confirmed without taking our word for it.
-
01
Real company
Essex Probuild Ltd, company 15979928, registered in West Bergholt. Checkable on Companies House in a minute.
-
02
Real cover
£2m public liability cover in place. Evidence available on request rather than a badge on a website.
-
03
Real reviews
4.6 out of 5 on Google from 10 reviews, shown as they were left. We do not curate them.
-
04
Real photographs
Every project image on this site is a job we built. No stock, and no fabricated before shots.
-
05
Real accountability
We notify Colchester City Council Building Control and manage the inspections through to your completion certificate.
Full width or partial width
More room against a heavier appearance, and on a designated site the appearance decides it.
A full width dormer runs the whole width of the rear roof between the party walls or gable ends, stopping only where it must for the eaves set back and the flank detailing. It gives the maximum floor area at full height, it is the arrangement that comfortably accommodates a double bedroom plus an en suite, and on a standard rear slope it is usually the most efficient use of the volume allowance.
A partial width dormer sits within the roof slope with retained slope either side, so the roof still reads as a roof with a box in it. It gives less floor area, it uses less of the volume allowance, and it looks considerably lighter from the garden and from any point where the roof is visible.
The trade off is genuine and it is not only aesthetic. In a conservation area a full width flat roofed dormer is the harder case to argue, and a set back partial width dormer with a pitched roof and matching tiles is the easier one. Outside a designation, where permitted development applies, a full width dormer is normal and unremarkable across most of Essex.
There is a middle position worth considering, which is a full width dormer set down further from the ridge and in from the flanks, with the cheeks clad to match the roof. It keeps most of the space and takes some of the weight out of the appearance. It costs slightly more to detail and it is generally worth it.

How a dormer is built
Cheeks, face, roof, and a set of junctions that all have to be right.
The sequence on site is fairly consistent. The scaffold goes up with a temporary roof over the working area. The section of rear slope is stripped and the rafters within the opening are cut back and trimmed, which means doubling or tripling the rafters either side of the opening and installing a trimmer at the head and at the sill to carry the cut rafters. Those trimmers are structural members and they are sized by the engineer, not chosen on site.
The cheeks are then framed, typically in timber studwork sitting off the new floor structure or off a plate carried by the trimmed rafters, sheathed and insulated. The face is framed with the window openings formed in it, and the head of the face carries the front edge of the dormer roof. The dormer roof is joisted across from the face back to the main roof slope, where it is tied into the existing structure.
Then the weathering, which is the part that determines whether the dormer is still dry in fifteen years. The junction where the dormer roof meets the main slope, the junctions where the cheeks meet the main slope, the abutment at the head, and the detail at the sill below the windows are all separate details and all of them are places water wants to get in.
Good practice is lead soakers and a lead flashing at every abutment, dressed and lapped properly rather than relying on sealant, with the cladding lapped over the flashing rather than the other way round. Sealant is a maintenance item. Lead is a detail.
The dormer roof: flat or pitched
Flat is normal, cheaper and gives more height. Pitched looks better and eats headroom.
Most dormers have a flat roof, laid to a fall of around 1:80 and finished in a single ply membrane, a liquid applied system, or high performance felt. Modern single ply and liquid systems are a long way from the felt roofs people remember failing in the 1980s, and on a small area with simple upstands they perform well. The fall has to be built in, the outlets have to be positioned where the water actually goes, and the upstands at every abutment need to be at least 150mm.
A flat dormer roof gives the most internal height for the space available under the ridge, which is why it dominates. It also gives the flat topped box appearance that people either accept as normal or dislike intensely.
A pitched dormer roof, either a small hip or a gable facing out, looks considerably better on most houses and is much easier to argue in a conservation area, particularly when it is tiled to match. It costs more, and it takes height out of the room, because the pitch has to start below the ridge and slope down towards the face. On a partial width dormer that is usually acceptable. On a full width dormer under a low ridge it frequently is not.
There is no universally right answer. There is the ridge height you have, the appearance you want, and whether the site is designated. Those three between them tend to settle it.
What might it cost?
A realistic range rather than a single number, with what it excludes shown as prominently as what it includes.
£44k to £60k
- VAT
- Kitchen and appliances
- Flooring
- Decoration
- Drawings and calculations
- Planning and Building Control fees
- Party wall surveyor
- Service diversions
Indicative only. The biggest variable around Colchester is foundation depth, because most of the ground is shrinkable clay and mature trees are common. We price the job after seeing it.
Get a real price
Cheeks and face: lead, tiles, render or board
The cladding choice is the biggest single influence on how the dormer looks from the garden.
Tile hanging uses the same tiles as the main roof, hung vertically on battens down the cheeks and sometimes the face. It is the option that disappears best, because the dormer reads as the same material as the roof around it. It is the strongest position on a designated site. It is heavier, which the structure has to allow for, and it costs more in labour.
Lead or lead substitute cladding on the cheeks is traditional, durable and looks appropriate on older property. Genuine lead is expensive and, on an accessible rear roof, is occasionally a theft risk. Substitutes perform well and cost less.
Render on a boarded and insulated cheek suits rendered houses and gives a clean flat face. It needs a proper substrate, a bell drip at the bottom, and movement joints where the run is long. Rendered cheeks that were fixed straight to sheathing without those details are a familiar source of cracking.
Fibre cement or composite board is the cheapest and quickest and it is what most volume conversions use. It is durable and low maintenance. It also looks like cladding, so on a house with no cladding anywhere else it is the option most likely to read as an addition rather than part of the building.
On a permitted development dormer the materials must be similar in appearance to the existing house, which sets the floor. Inside a conservation area the expectation is generally higher and tile hanging or lead are the safer routes.
The floor underneath the room
Existing ceiling joists are not a floor and cannot be made into one by boarding over them.
The timbers you can see across your loft were sized to hold up a ceiling and nothing else. They are typically shallow, often at wide centres, and they were never intended to carry people, furniture and a bathroom. Boarding over them produces a storage deck, not a floor structure, and the fact that it feels solid when you walk on it is not evidence of anything.
A conversion introduces new floor joists, deeper than the existing ceiling joists, usually spanning between load bearing walls and carried at each end on steel beams. Those steels bear into the masonry of the flank and party walls in pockets cut for the purpose, and the bearings are checked by the engineer because they concentrate what were previously distributed loads onto a small area of wall.
The new joists sit above the existing ceiling joists rather than replacing them, with a gap between the two so that the new floor does not transmit movement into the ceiling below. That is part of why head height is consumed from the top and the bottom at once.
Where the dormer sits, the floor has additional work to do, because the dormer cheeks and face bear onto it and the trimmed rafters around the opening transfer load down into it. The floor design and the dormer design are one structural problem rather than two, and they are calculated together. A chimney breast in the same space is part of that calculation too.
Get a real number, not a range.
We come out, look at the ground, the access and the structure, and price the job we have actually seen. The survey and the quotation are free.
Cut roof or trussed rafters
The single biggest cost variable, and you can tell which you have in thirty seconds.
Put your head through the hatch. If you see large sloping rafters with horizontal purlins running across them and diagonal struts propping the purlins down onto a wall below, you have a traditional cut roof. If you see a repeating pattern of lightweight timbers forming triangles and W shapes across the whole space at close centres, you have a trussed rafter roof.
A cut roof is generally straightforward to convert. The purlins and struts are removed or relocated once the new structure carries what they were carrying, and the rafters are usually deep enough to insulate between with a ventilation gap.
A trussed rafter roof is a different job. Every one of those diagonal webs is doing structural work, and cutting one before the replacement structure is in changes the load path in a way that can be serious. Converting a trussed roof means installing the new steels and floor first, then new structure to carry the roof, and only then removing the webs, truss by truss. It is entirely possible and it is done all the time. It is not the cheap conversion people assume, and the difference in price against an equivalent cut roof is meaningful rather than marginal.
As a rough rule of thumb, housing built from the mid 1960s onwards in this country is likely to be trussed, and anything earlier is likely to be cut. It is a rule with exceptions, so look rather than assume.
Fire, Part B and the protected stairwell
Adding a third storey changes the escape route for the entire house.
This is the part homeowners are least prepared for and it is frequently the biggest cost after the structure itself.
A two storey house escapes through the windows, because you can get out of a first floor window onto the ground. A three storey house cannot make that assumption, so the staircase becomes the escape route and it has to be protected from the top floor all the way down to the final exit door.
In practice that generally means fire doors on every habitable room opening onto the stairwell, on every floor and not only the new one, fitted with the correct intumescent strips and closing properly. It means the walls and ceilings enclosing the stairwell achieving 30 minutes fire resistance, which on an older house with lath and plaster usually means overboarding. It means interlinked mains powered smoke alarms on every level, with battery backup. And it means the new floor achieving 30 minutes fire resistance from below.
Where a protected route is genuinely not achievable, most often because the ground floor has been opened up and the stairs arrive directly into a living room, there are recognised alternatives. A sprinkler or water mist system to the affected areas is the usual one. These are legitimate solutions and they cost money, and the essential point is that the approach is agreed with Building Control before work starts rather than discovered at the first inspection.
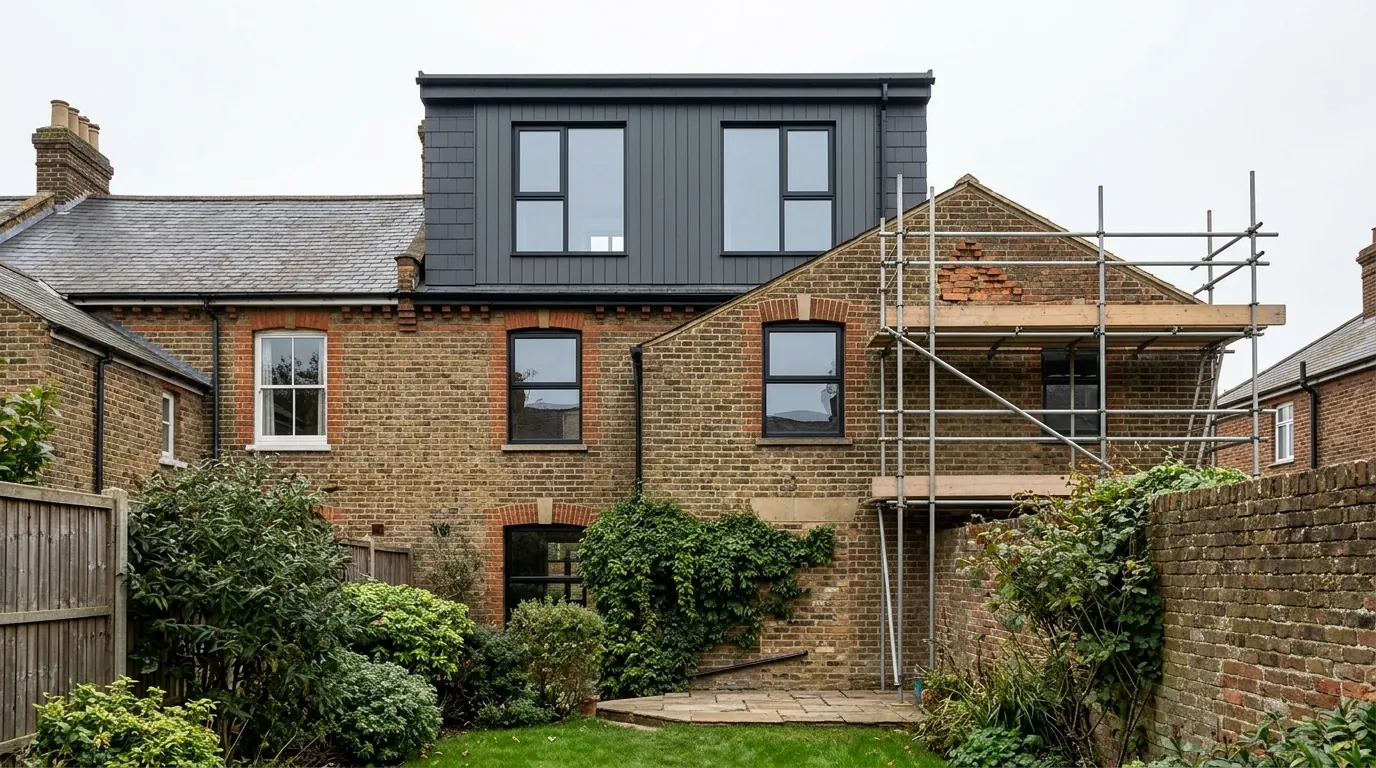
Escape windows, and where they sit in the dormer
Every habitable room in the loft needs one, and the dimensions constrain the dormer design.
An escape window is required in each habitable room in the conversion. The clear opening must be at least 0.33 square metres, with a minimum of 450mm in each direction, and the bottom of the opening must sit between 800mm and 1100mm above the finished floor. It has to be openable without a key and the opening light has to stay open unaided.
On a dormer that is a design input rather than a later selection. A dormer window that looks right in elevation may have a sill at 600mm, which fails, or an opening light that gives 440mm of clear width once the frame and the hinge are accounted for, which also fails. Clear opening is the hole you could actually climb through, not the size of the window on the order sheet.
Where the room has a low sill for the view, the answer is usually a separate opening light sized and positioned to comply, or a rooflight in the retained slope acting as the escape opening. Both work. Both need deciding at drawing stage.
It is also worth remembering that the escape window is only useful if what is below it is somewhere a person can reach. An escape window over a conservatory roof or a lightwell is not the same proposition as one over a garden, and Building Control will take a view on it.
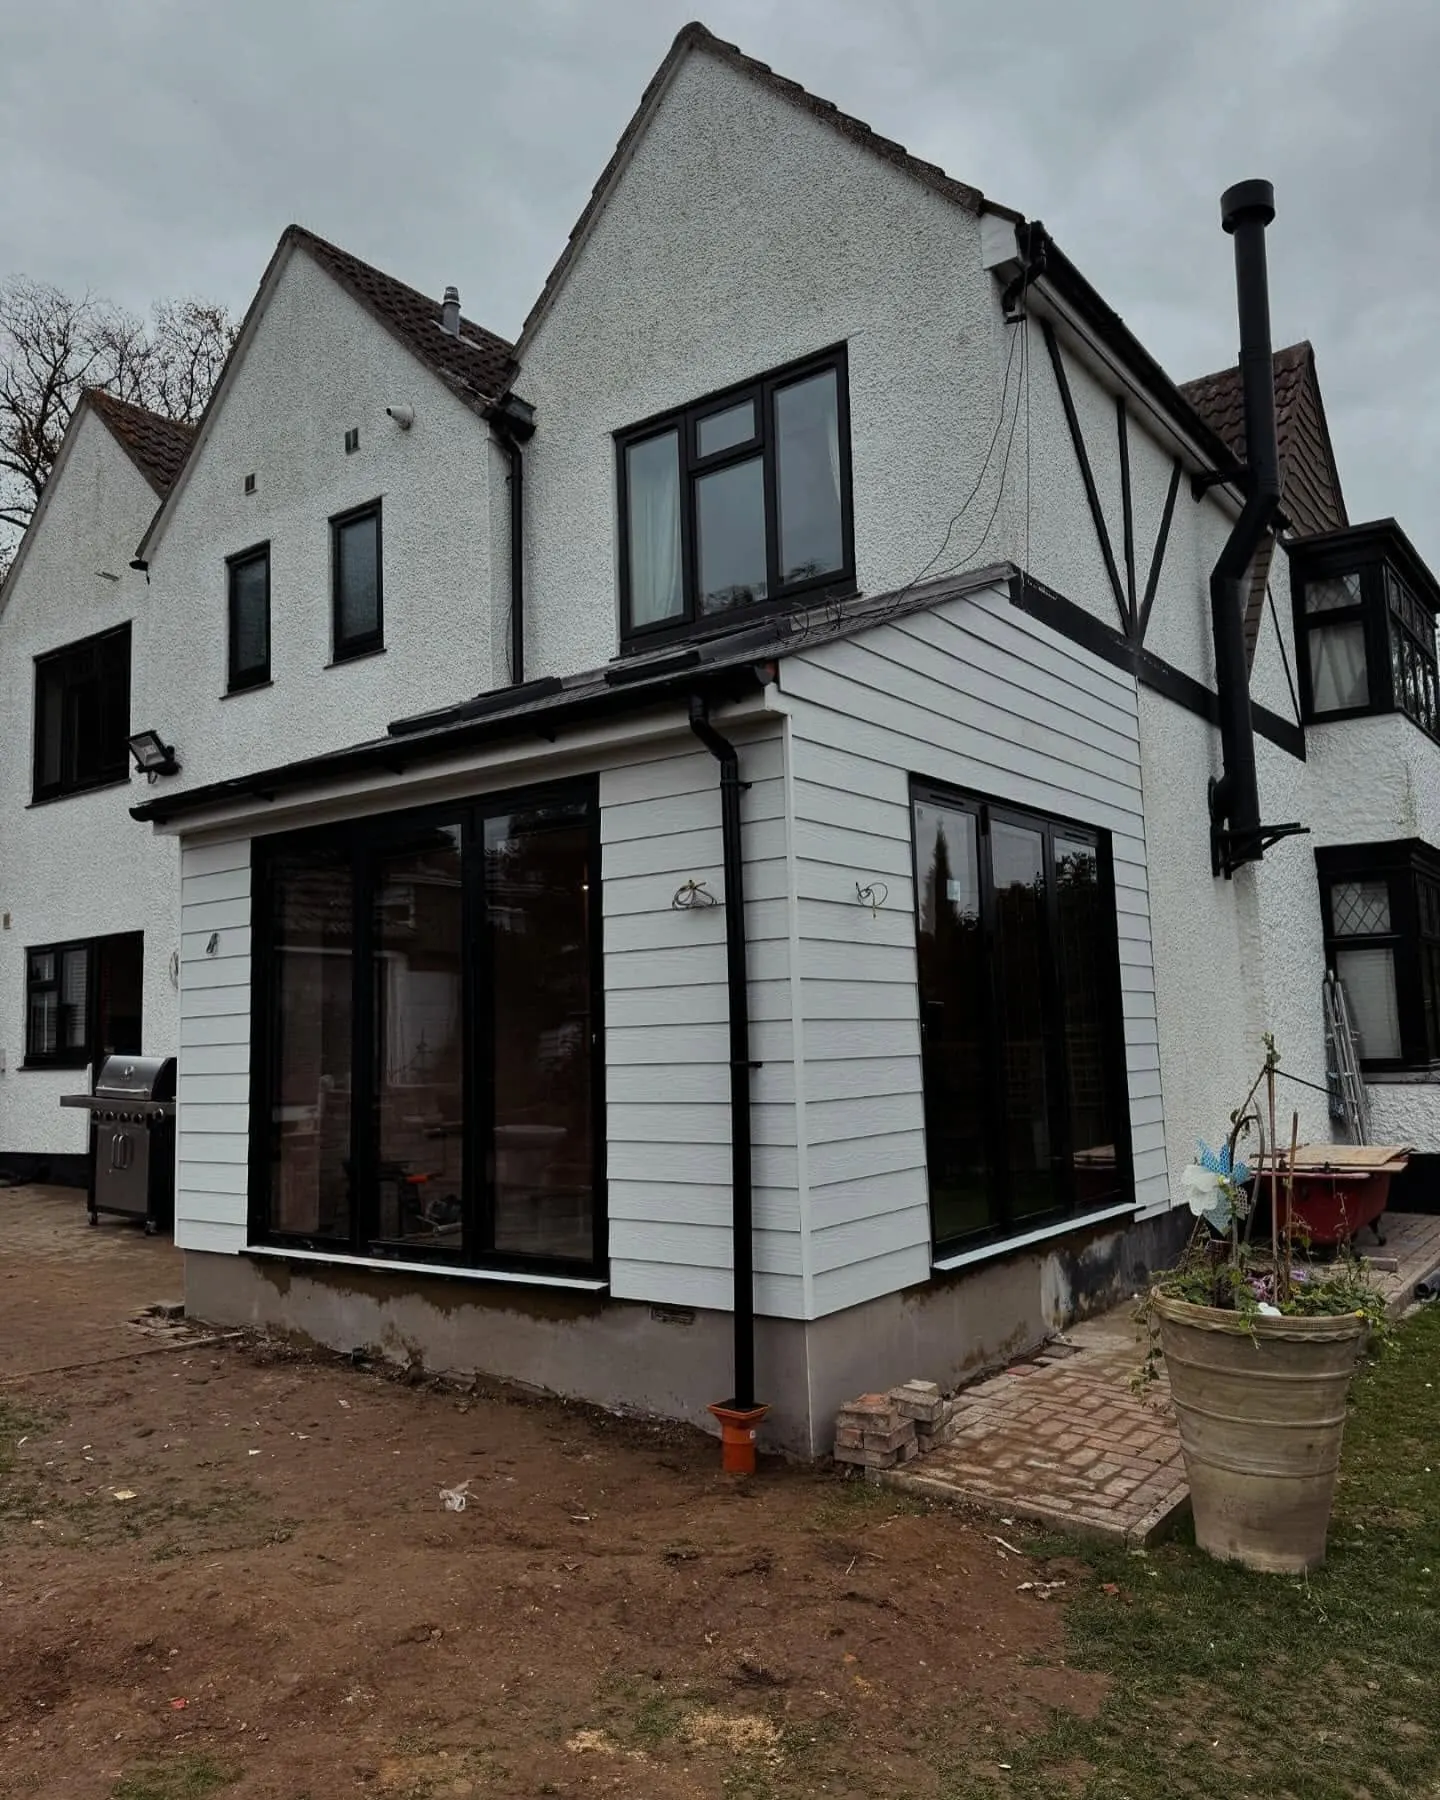

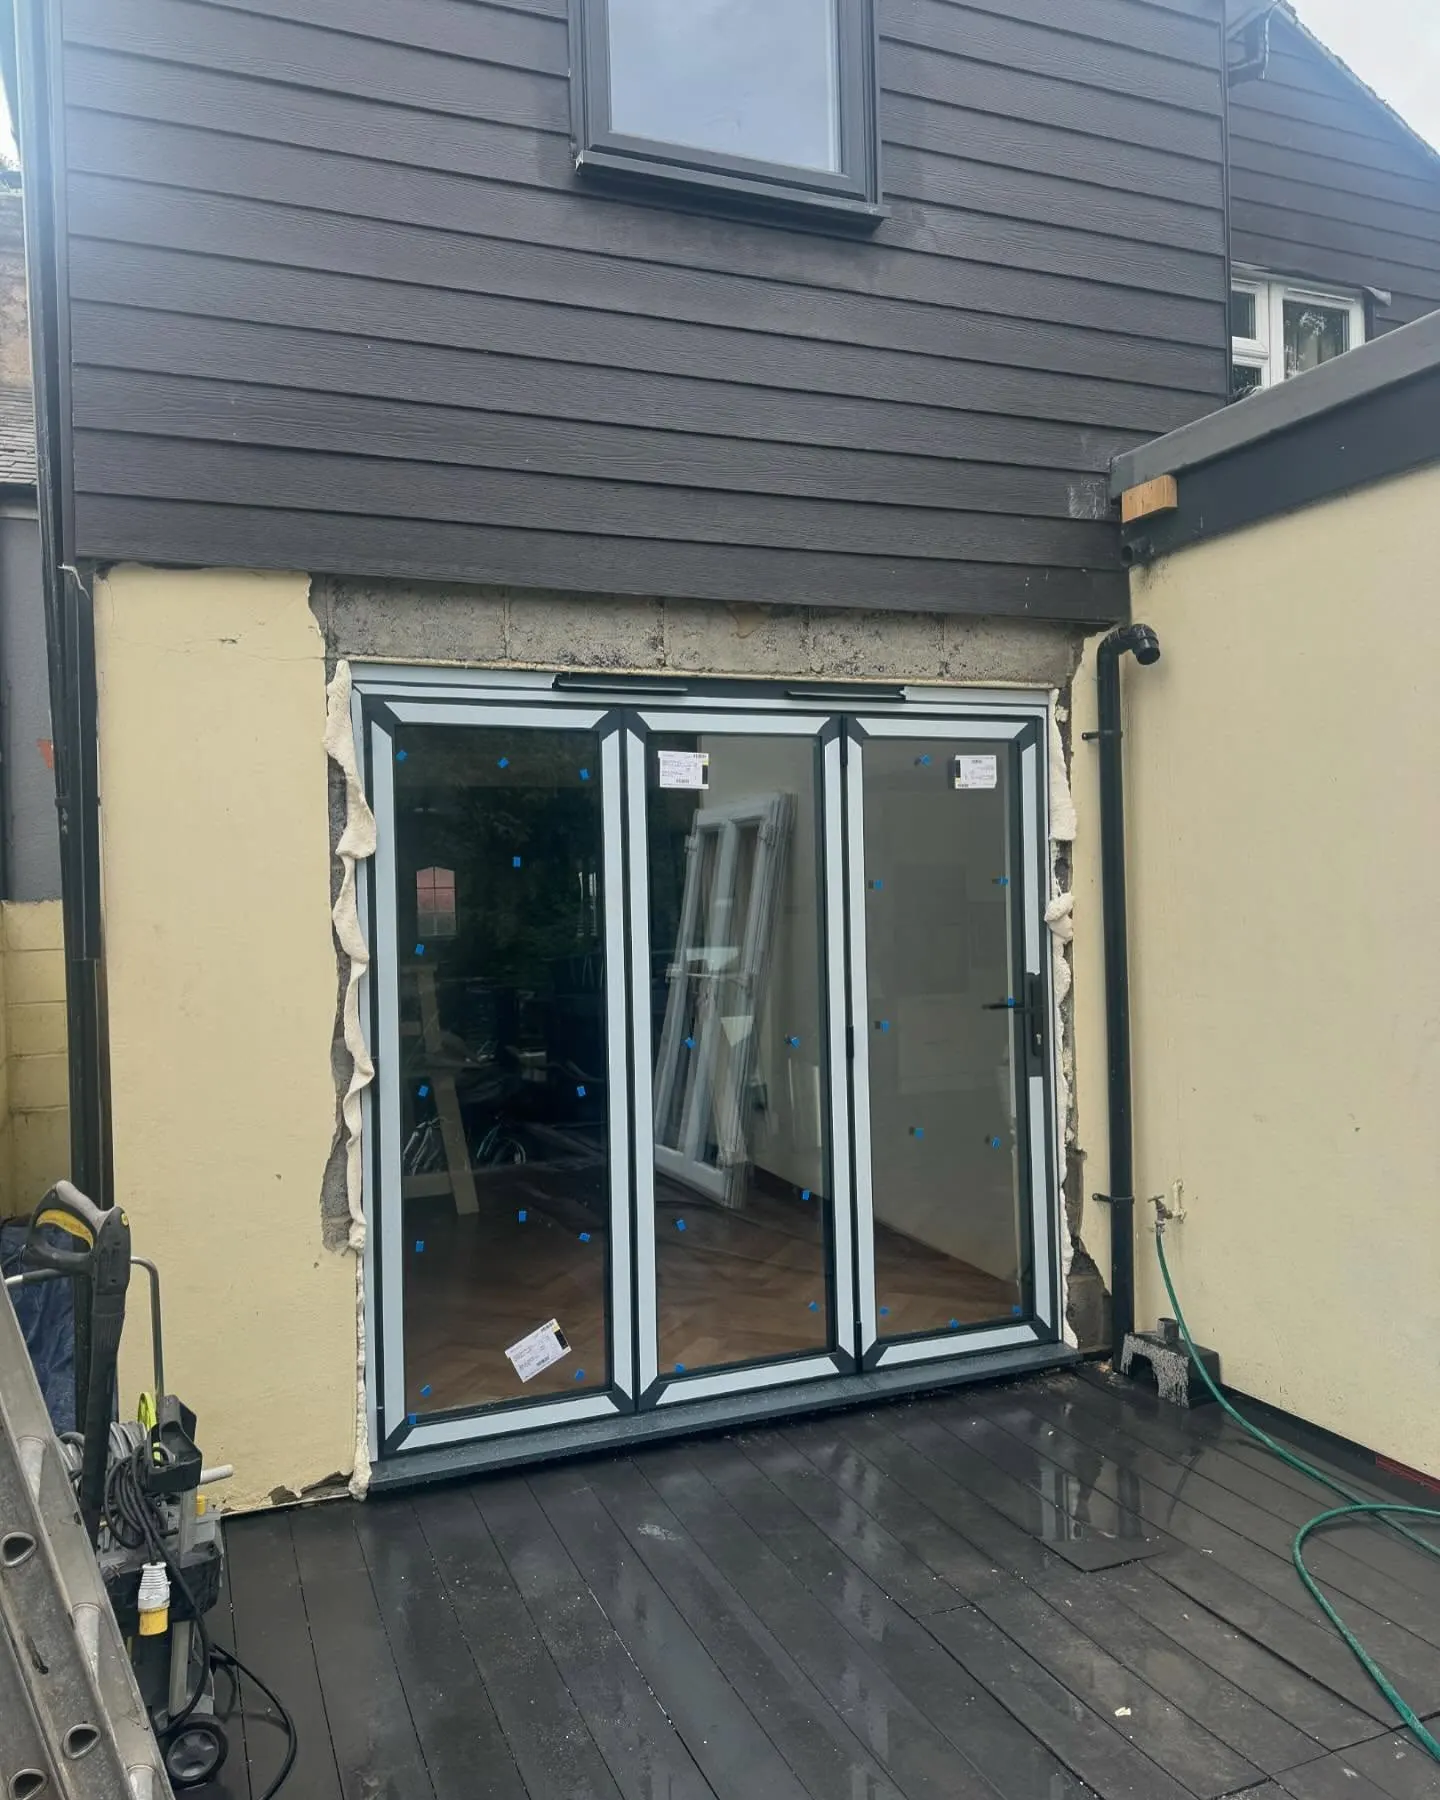
 Fig. 01
What actually happens, in order
Three of these eight stages happen before anybody digs anything. Get the order wrong and you pay to redo work.
-
Survey
We look at the ground, the trees, the access, the existing structure and where the drains actually run.
-
Drawings
A technician produces existing and proposed plans and elevations to a standard the council will accept.
-
Permissions
Permitted development, prior approval or a full application. We submit it and handle the correspondence.
-
Structure
The engineer calculates the beams, the padstones and the foundation depth for your ground.
-
Groundworks
Dig, concrete and drainage. The messiest phase and the one that decides whether the rest stands still.
-
Structure up
Walls, steel into the opening, roof on, windows and doors in. The day the back wall comes out is planned with you.
-
Fit out
First fix, plaster, second fix. From here it stops being a building site and starts being a room.
-
Certificate
Final inspection and your Building Control completion certificate. Keep it with the deeds.
The staircase
Where it lands decides more about the project than anything you choose to look at.
Part K sets a maximum pitch of 42 degrees for a private stair, along with minimum going and maximum rise dimensions, handrail requirements, and 2 metres of headroom measured vertically above the pitch line. That headroom requirement is what usually determines the position, because the new flight rises through the existing roof structure and there has to be height above it where it arrives.
The two usual positions are over the existing staircase, which keeps the circulation stacked and is generally neatest, or into an existing bedroom, which costs you part of that room. On a terrace, over the existing stairs is frequently the only option that does not sacrifice a bedroom, and it works where the landing has the length for it.
A dormer helps here more than people realise. Because the dormer creates full height at the rear of the loft, a stair arriving at the back of the plan has somewhere to arrive into, and the 2 metre headroom at the top of the flight is easier to achieve. On some plans the dormer position is chosen partly to solve the staircase rather than purely to make the bedroom work.
Space saver stairs with alternating treads are permitted for a loft conversion in specific circumstances. They are a genuine option when nothing else fits and they are unpleasant to use, awkward with laundry, and Building Control will want to be satisfied about what the room they serve is used for. Treat them as a last resort.
The party wall on a semi or a terrace
Steels bearing into the party wall is notifiable work with a two month period.
On a semi detached or terraced house the new floor steels almost always bear into the party wall shared with your neighbour. Cutting a pocket into that wall to seat a beam is work to a party structure under section 2 of the Party Wall etc. Act 1996, and it requires formal notice served by you as the building owner, with a two month period before work may begin.
On a dormer there can be more than that. Where the dormer cheek runs up to or along the party wall line, or where the party wall has to be raised or made good above roof level, further sections of the Act can be engaged. The notice needs to describe the work properly rather than generically.
None of this indicates a dispute and none of it means anything is wrong. It is the standard legal process for building work touching a shared structure. It becomes a problem only when it is left late, because a two month statutory period is shortened only by the adjoining owner consenting in writing, not by everyone being reasonable about it.
Where a neighbour dissents, surveyors are appointed and an award is drawn up recording the condition of their property beforehand and setting out how the work proceeds. You pay for it. On a loft conversion that is a real budget line rather than a remote possibility, and it belongs in the quotation rather than in a conversation afterwards.
The practical advice costs nothing: speak to your neighbour yourself, with the drawings in your hand, before a formal notice lands on their mat. A schedule of condition protects both of you and it is what prevents an argument in two years about a crack that was already there.
Insulation, warm roof and condensation
A dormer has more external surface than the roof it replaced, and every junction is a place moisture can condense.
Part L applies to the new thermal elements, and a dormer creates a lot of them: two cheeks, a face, a flat roof and the retained slope either side. Each has to hit a target U value and each has to be detailed so warm moist air from inside cannot reach a cold surface within the construction.
On the sloping parts of the roof there are two approaches. A cold roof puts insulation between the rafters with a continuous ventilated air gap of at least 50mm above it, ventilated at eaves and at ridge so moisture is carried away. It is cheaper and it depends entirely on that ventilation path staying clear along its whole length. Insulation pushed tight against the underside of the felt, which happens when someone tries to gain a few extra millimetres, blocks the path and the roof timbers start to suffer.
A warm roof puts insulation over the rafters, or over the flat roof deck, keeping the whole structure on the warm side. It performs better, it removes the ventilation dependency, and it costs more. On the dormer’s flat roof a warm deck is generally the right answer, because ventilating a small flat roof properly is difficult and a cold flat roof that is not properly ventilated is a condensation trap.
Whichever approach is used, the vapour control layer on the warm side has to be continuous and sealed at every junction, especially around windows and where the cheeks meet the floor. Downlighters punched through it are a common cause of the damp patch that appears in the second winter.
Overheating in summer
A dormer bedroom has more glass and more exposed roof than any other room in the house.
Loft rooms overheat. The roof takes direct sun for the whole day, the room sits at the top of the house where warm air collects, and the dormer face is usually a large area of glazing facing the same direction as the rear garden. If that is south or west, the room becomes uncomfortable from May onwards unless it is designed against.
Part O covers overheating in new dwellings, and while the position for a conversion is not identical, the physics is. The measures that work are the same either way: solar control glazing in the dormer windows and any rooflights, insulation depth above the minimum rather than at it, external or integral shading on the worst orientation, and openable lights positioned so that warm air can leave at the highest point in the room rather than only at sill level.
A rooflight in the retained slope on the opposite side of the room from the dormer window is worth its cost several times over, because it gives cross ventilation and it lets heat out at the top. It also gives a second escape opening and daylight from a second direction.
Heating deserves a thought too. Adding a floor increases the load on the existing boiler and the loft is the furthest point from it, so flow and return runs are long. A separate zone with its own thermostat is a small cost at first fix and it is the difference between a comfortable top floor and one that is always either too warm or too cold.
Tanks, pipework and the en suite
Whatever is currently sitting on your ceiling joists has to go somewhere.
Older houses frequently have a cold water storage tank and a small feed and expansion tank sitting in the loft, usually in exactly the position the new bedroom wants. Where the house is on a combi boiler they are normally redundant and can be removed, which is the easy outcome. Where the system is vented with a hot water cylinder, they are doing a job, and the options are relocating them onto a properly supported platform in whatever roof space remains, or converting the system to unvented or to a combi as a separate piece of work with its own cost.
That decision changes water pressure throughout the house, so it deserves proper thought rather than a default. A gravity fed shower in a loft en suite sitting a metre below a relocated tank will be disappointing, which is why loft bathrooms are usually specified with a pump or on an unvented system.
The en suite also needs a soil connection, and routing a 110mm stack from the top floor down to the drain is a decision with consequences. Sometimes it boxes neatly into the corner of a bedroom below. Sometimes it runs externally on the rear elevation, which is straightforward on a dormer because the stack can be brought out through the retained slope beside the dormer. Occasionally the answer is a macerator, which works but is a compromise and cannot serve as the only WC in a dwelling.
Mechanical extract from the en suite must discharge to outside air, usually through a tile vent in the retained slope or through the dormer cheek. It needs insulated ductwork on the shortest sensible route, because uninsulated duct running through a cold void condenses and drips back.
What a dormer loft conversion costs
Indicative ranges, current at the review date below, and not a quotation.
| Element | Typical range | Notes |
|---|---|---|
| Rear dormer conversion | £1,500 to £2,200 per m² | Cut roof, standard specification |
| Trussed rafter roof | Add 10 to 20 per cent | New structure before trusses come out |
| Tile hung or lead cheeks | Add over board cladding | Usually the conservation area answer |
| Pitched dormer roof | Add over a flat roof | Better appearance, less head height |
| En suite | Separate allowance | Soil route and pump or unvented system |
The per square metre figure includes the structural steels and new floor, the dormer structure, weathering and cladding, roof alterations, insulation, dormer windows and any rooflights, the staircase, fire doors and the protected stairwell works throughout the house, plastering, first and second fix carpentry, electrics and plumbing to a standard specification, and making good.
It excludes: VAT, sanitaryware and tiling to the en suite, fitted wardrobes, floor coverings, decoration, professional fees for drawings and structural calculations, planning or Lawful Development Certificate fees, Building Control fees, party wall surveyor fees where a neighbour dissents, and anything genuinely unforeseeable once the roof is opened up.
The variables that move the figure most are the roof type, the amount of fire protection the existing stairwell needs, the cladding specification, whether there is an en suite and how far the soil route has to travel, and whether the water system has to change. A trussed roof with a full stairwell upgrade, tile hung cheeks and an en suite is a different job from a cut roof dormer with board cheeks and no bathroom, and the two are quoted as though they were the same thing far too often.
How long it takes, and living through it
Six to ten weeks on site, with two phases that are genuinely intrusive.
Before site: where the dormer is permitted development there is no planning application, though we would apply for a Lawful Development Certificate. Where a full application is required it is the statutory eight weeks from validation, longer if it goes to committee. Building Regulations full plans approval runs alongside. Party wall notices on a semi or terrace run one or two months and they should be served early rather than at the point the scaffold is booked.
On site, a rear dormer conversion is commonly six to ten weeks. Scaffold and temporary protection, then the steels and new floor, then the roof opening and the dormer structure, then weathering and windows, then the staircase, then first fix, plaster, second fix and decoration.
Two phases are the ones people remember. The open roof phase, when the rear slope has been stripped and the opening formed, lasts a few days and the roof is covered with temporary sheeting during it. It is secure and it is noisy in rain and unsettling in wind, and knowing in advance that it is normal helps.
The stairwell week is the genuinely disruptive one, because it happens inside the house rather than above it. The first floor landing becomes a building site, the ceiling comes down where the stair opening is formed, and fire doors go onto rooms you are living in. Dust from that phase travels further than anyone expects, so protection matters, and managing it is our job rather than yours.
Most families stay in the house throughout. The bathroom and kitchen stay in use the whole time, which is the main difference from living through a rear extension.
Which Colchester housing suits a dormer
The roof tells you more than the postcode, though the two track each other closely.
Interwar and 1930s semis across Lexden, Prettygate and older Shrub End have hipped roofs and cut structure. A dormer alone helps but rarely enough, because the hip removes width at exactly the point the room needs it. The usual answer here is hip to gable plus a rear dormer together, which produces a genuine double with an en suite. Watch the combined volume against the 50 cubic metre allowance, because the two together can exceed it.
Victorian and Edwardian terraces in New Town and off Maldon Road have tall steeply pitched cut roofs with real head height. A rear dormer works extremely well on these and where there is a rear outrigger the L shaped version produces a great deal of space. The constraints are the narrow landing for the staircase, the 40 cubic metre terraced allowance, and the conservation area position across parts of the historic core.
Post war housing around Greenstead, Monkwick and Old Heath is mixed. Pre mid 1960s is likely cut and workable. After that, trussed rafters become normal and the job changes character and price.
Estate housing from the 1980s onwards in Stanway, Myland and Highwoods is almost all trussed rafter with shallow pitches. The shallow pitch is the real issue, because the ridge is low and a dormer cannot go above it, so the height may simply not be there. These are also the houses most likely to have permitted development removed by an estate condition, and the ones most likely to be quoted cheaply by somebody who has not been in the loft.
Village property around Dedham, Wivenhoe, Coggeshall, Boxted and Great Horkesley runs from straightforward to genuinely complicated, with listed status and conservation designation both in play. Worth a proper look rather than an assumption in either direction.
What goes wrong on a badly built dormer
Almost every defect we get called to is water, ventilation or something that was never notified.
Leaks at the abutments. The junctions where the cheeks and the dormer roof meet the main slope are the weak points, and where they were sealed with mastic instead of flashed with lead they fail within a few years. The symptom is a damp patch inside at the top of a cheek, usually appearing in driving rain from one direction only.
Flat roof failures. Insufficient fall, so water ponds, or upstands below 150mm, so water gets behind the membrane at the abutment. Both are design errors that show up as a stain on the ceiling.
Condensation in the roof void. Insulation stuffed tight against the felt with no ventilation gap, or a vapour control layer punctured by downlighters. The timbers get damp, mould appears in the corners, and the room smells wrong in winter. Expensive to put right because it means opening up what was finished.
Rendered cheeks cracking, usually from render applied to an inadequate substrate with no movement provision and no bell drip at the bottom.
No Building Control involvement at all. The one that causes the most trouble, because it surfaces at sale. A loft room with no completion certificate is a room a conveyancer will not accept as a bedroom, and regularisation after the event means opening up finished work so an inspector can see what is behind it.
Undersized or missing fire protection. Ordinary doors instead of fire doors, no interlinked alarms, a stairwell that was never enclosed. It is the one defect on this list where the consequence is not financial.
Tell us what you are planning.
One contract, one contact, and the drawings, the engineer and the Building Control notification are our job rather than yours.
Questions we get asked
Do I need planning permission for a rear dormer?
Usually not, provided the volume sits inside the allowance and the conditions on set back, materials, ridge height and side windows are met. Flats and Article 4 directions remove the right entirely. Listing does not, though it adds a separate listed building consent that is usually the harder hurdle. Conservation areas restrict it, and a rear dormer there generally becomes a full application. Estate conditions on newer housing remove it too. We check the position on your address before anything is drawn.
Can I have a dormer on the front of the house?
Not under permitted development where the front elevation fronts a highway. It can be applied for, and outcomes vary by street and by authority. We would never tell you an application will succeed, and anyone who does is guessing.
How much head height do I need?
Measure ceiling joist to ridge. Around 2.4 metres is comfortable. Below roughly 2.2 metres a dormer alone will not solve it, because a dormer creates height at the sides and cannot exceed the existing ridge. At that point the conversation is about raising the ridge or a mansard, both of which are applications.
Will a full width dormer look wrong?
It depends on the house and on what is visible from public view. On a standard rear slope with fencing and gardens behind, a full width dormer is normal across Essex and nobody notices it. On a prominent roof, or inside a conservation area, a set back partial width dormer with a pitched tiled roof is a very different proposition and usually the right one.
Does a dormer need fire doors throughout the house?
Generally yes, on habitable rooms opening onto the stairwell on every floor, because the stair becomes the protected escape route once the house has three storeys. It is the item people are least expecting and it is not optional.
Can the dormer go right up to the ridge?
No. Nothing may sit above the highest part of the existing roof, and in practice the dormer roof needs to sit down from the ridge with a course or two of tiles above it so the abutment can be weathered properly. A dormer that appears to reach the ridge in photographs almost always has a small retained strip above it.
What about the neighbour’s dormer, which looks bigger than what I have been quoted?
Worth checking before assuming. It may have been applied for, it may predate a designation or an Article 4, it may sit on a semi with the larger allowance while yours is a terrace with the smaller one, or it may simply be unauthorised. Somebody else’s dormer is not a precedent you can rely on.
How we work
One contract, one contact, and the paperwork is our responsibility rather than yours.
Our team has 25+ years in the trade and comes out to look at it. On a dormer the survey measures the head height properly at the ridge, establishes whether the roof is cut or trussed, checks the rear slope for the eaves set back and the ridge clearance, works out where a compliant staircase can land, and looks at what the existing stairwell will need for fire protection. Where the volume looks marginal against the allowance, we say so on the day rather than after you have paid for drawings.
Most people who call us already have drawings and permission and want a builder to price the work and build it. That is the ordinary job here, and we are glad to work to somebody else’s plans. Where the drawings do not exist yet, we bring in the technician who draws it and the structural engineer who sizes the steels, the trimmers and the new floor. We manage the planning route or the Lawful Development Certificate application, we serve any party wall notices in good time, and we notify Colchester City Council Building Control and manage the inspections through to your completion certificate.
Probuild Extensions Colchester is the extensions arm of Essex Probuild Ltd, company number 15979928. We carry £2m public liability cover and everything is built to current Building Regulations. We are based in West Bergholt, about three miles north west of Colchester, and we work across the city and roughly thirty miles around it.
If the honest answer on your house is that the ridge is too low, that the volume has already been spent, or that the staircase costs you a bedroom you cannot afford to lose, we will tell you that. The survey and the quotation cost nothing either way.
Last reviewed August 2026. Planning rules and Building Regulations change, and your property may differ, so treat this as a guide rather than advice on your specific job.